
Point and Shoot--Taking Photos for the DSFCA Calendar
by Tonya Jensen and Sally Frankel
This article is designed to give you information on how to take
good print quality photos for the Danish/Swedish Farmdog annual
calendars. Some of the subjects covered are:
Taking Picture of Animals
Dogs do not understand what we are trying to do and won't just pose for the camera! Here are some tips that will help you to get better pictures of your dogs.
Use Natural Light
If possible always use natural light when taking your picture.
Avoid flash, as flash burst can, not only cause red-eye, but
also frighten the animal. Instead try to go outside or, if it
is not possible, in a room well lit by a large window. Read
more about lighting...
Backlighting
The best animal pictures are taken with the light behind the subject. The dogs fur will stand out, be sharp, and give a nice halo effect. Think of a picture of ice on a tree at sunrise. You can only see the sparkle if the sun is behind the ice. This will give your picture depth. Taking pictures with harsh light shinning on the dog will flatten your picture.
Keep the Eyes Sharp
Having sharp eyes is important in any kind of portraits photography. The dog's eyes can be very expressive. So make sure to focus on your pet's eyes and keep the tack sharp
Go to Them
It is very important that your dog feels comfortable and at ease, so instead of forcing him to come to you go to him. Most important is to get down to his level; we all know how a dog looks when viewed from above, this is the way we always see them. Show us the way they see world! Sit on the floor or lie on your belly and remember to shoot from HIS eye level or below.
Give Value to their Character
You know your dog better than anyone else, and a successful picture is one that conveys the character of its subject. If you have a lazy dog show him yawning, if your dog is playful, show him in action performing his favorite trick.
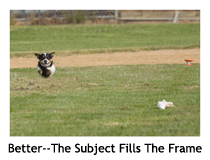
Go to Close-up
Put on that long lens and fill the frame with your pet's face and fur, close up shots often make beautiful portrait. Read more about close up photography
Surprise Them
One of the most difficult things is to let your dog hold still. An easy trick is to let him play quietly and, once you have everything ready, let someone call for him or whistle. This will surprise him, catch his attention, and you will have a few seconds to capture him in a nice and alert posture.
Schedule your Session
If you are longing for a formal dog portrait, try to wait for a time when your dog is sleepy it will be much easier to keep him still. If you want a more dynamic shot then pick a time when your dog is energetic.
Be Patient
Dog photography requires a lot of patience. No matter how excited your furry friend is, if you are patient enough, he will end up by relaxing and you will have the opportunity to get a decent shot.
Experiment
Take your time and enjoy the moment, try different approaches, angles and compositions. Shoot a lot you will have time to worry about the results later. Good photographers will fine one good photo out of 100 to 200 shots.
How to take good pictures
Who wouldn't love to see a photo of their favorite Farmdog on one of the pages of our always awesome DSFCA yearly calendar? To help you get that perfect shot for consideration for the DSFCA Calendar, here are some simple hints:
-
ALWAYS take your photos in the highest resolution your camera will allow. Photos that look great attached to email or on the Web do not have the resolution necessary for printing. more about resolution...
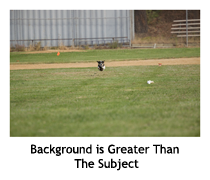
- Look at your surroundings and background. Will they compliment
your subject or will your subject be lost in the confusion
surrounding it? Watch for colors and patterns that will cause
your subject to be "sucked in” to them, i.e. if your subject
is mostly black, choose a light color, if white, choose a darker
color. Strong colors can take focus away from your subject.
Soft greens and blues will compliment most subjects.
- Pay close attention to available
lighting. The best times of day for taking photos are before
10:00 a.m. and after 4:00 p.m. An overcast day provides a very
desirable light and minimizes shadows.
- Where is the light in your photo, behind or in front of
your subject? Is it causing shadows on the subject? Throw out
the rule that says the subject should be facing the sun---not
necessarily so BUT you do need to compensate if the light is
coming from the side or back of your subject. This can be done
by using a flash or by bouncing light off some other surface
such as the light reflected from a light colored building.
You may also use a piece of white poster board to bounce light.
ALWAYS use a flash when photographing subjects that are in
uneven light such as those that might be standing under a tree.
- You can avoid glowing eyes
(the dog equivalent of red eye) by bouncing the flash as described
above. Bouncing attachments are available for SLR cameras.
You may also purchase flash filters for SLR cameras that will
soften the light. Don't have an SLR camera, try putting a single
piece of tissue over your flash.
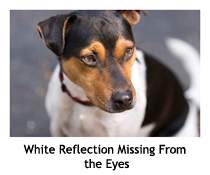
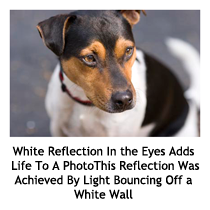
- The difference between a picture and a really good photo
is often a tiny dot of white in the eye of the subject. This
dot gives the photo life. It is sometimes accomplished with
natural light but more often by the use of flash or bounce
lighting.
- If your dog has a predominately black face, always use a
flash.
- When framing your picture use the rule of thirds, your subject
should NEVER be in the exact center of your photo or looking
straight at the camera. Try to find a tree or another object
to frame in your subject. The best pictures have something
in the background to lead your eyes to the subject.

- Pay attention to the horizon and angle of your camera. A
monopod or tripod might be helpful.
- Fill your photo frame with your subject.
- Look for a moment that tells a story.
Understanding Your Camera and Print Quality Photos
Resolution
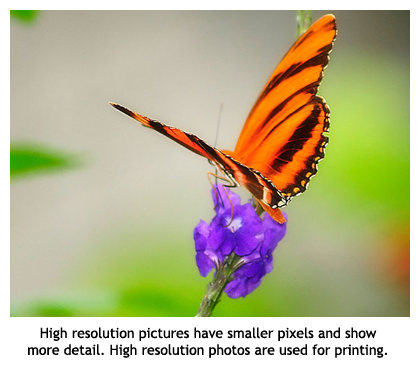
You hear us talking about high-resolution pictures, I will explain what that means. Your digital photo is made up of tiny squares called pixels. For excellent quality images, you want more pixels per inch and you want larger pictures. The more pixel dense a photo, the larger size you can print.
(Reprinted with permission from Adobe)...
The number of pixels displayed per unit of length in an image is called the image resolution, usually measured in pixels per inch (ppi). An image with a high-resolution contains more, and therefore smaller, pixels than an image of the same dimensions with a low resolution. For example, a 1×1 inch image with a resolution of 72 ppi contains a total of 5184 pixels (72 pixels wide x 72 pixels high = 5184). The same image with a resolution of 300 ppi would contain a total of 90,000 much smaller pixels.
Because they use more pixels to represent each unit of area, higher-resolution images can usually reproduce more detail and subtle color transitions when printed than lower-resolution images. However, once an image has been scanned or created at a given resolution, increasing the resolution in Photoshop will not usually improve the image quality because in this case, Photoshop must in effect spread the same pixel information across a greater number of pixels.
The proper image resolution to use for an image depends on how you intend to display or distribute the image. Using too low a resolution for a printed image results in pixellation - large pixels that produce very coarse-looking output.
Note: We use 72ppi for e-mail and the Web site photos but we require 300ppi for printed items like the DSFCA Calendar.
A printer is a high-resolution device. The usual method of printing is to set the image resolution at 300 ppi but you can also go down to 200 ppi and still get a reasonably sharp image. So if you want a final print of 12 X 9 inches, the print size of our Calendar, you need to save your file or scan a print at 200 or 300 ppi for the print to be acceptably sharp. Learn more about scanning photos ...
Pixel Count
One way to categorize digital cameras is in terms of pixel count. This is the number of individual pixels that go into making each image. Today this number varies between 1 million (1 Megapixel) to around 14 million (14 Megapixels). A million pixels is abbreviated to MP, so a 1MP camera has 1 million pixels and a 3MP camera has 3 million pixels. A 3MP camera can make excellent 4"x6" prints and very good 5"x7" prints. If you intend to take pictures for the DSFCA Calendar, then you must use at least a 5MP camera. The chart below gives you a good idea of the output range of some digital cameras.
| 3MP | 4MP | 5MP | |
|---|---|---|---|
| Largest Image (typical) | 2048 x 1536 | 2272 x 1712 | 2592 x 1944 |
| Print size at 320dpi | 6.5" x 4.8" | 7.1" x 5.4" | 8.1" x 6.1" |
| Print size at 240dpi | 8.5" x 6.4" | 9.5" x 7.1" | 10.8" x 8.1" |
Now that you have a better understanding of the camera quality required, you need to make sure that you have the proper setting for large format pictures.
Camera Settings
Aperture
The main function of a camera lens is to collect light. The aperture of a lens is the diameter of the lens opening and is usually controlled by an iris. The larger the diameter of the aperture, the more light reaches the film / image sensor.
Aperture is expressed as F-stop, e.g. F2.8 or f/2.8. The smaller the F-stop number (or f/value), the larger the lens opening (aperture).
Hint: For pictures in low light set your camera with a larger opening (F2.4) to allow more light to enter the lens. If you want to stop action or are in bright light, set your camera with a smaller opening (F16 or F22).
Aperture Priority
(Depicted by an "A")
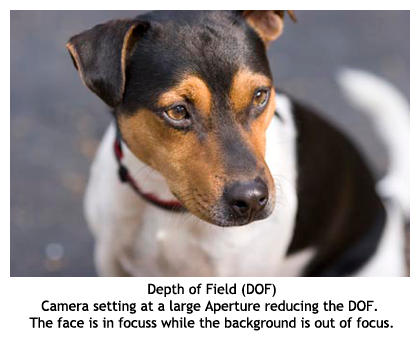 |
The aperture priority setting is still fairly automatic, but you have the freedom to choose the f-stop. Use the aperture priority setting for a short depth of field, this will keep the foreground in focus while blurring the background.
The numbers you see on the side of a lens usually look like this:
F 22 | 16 | 11 | 8 | 5.6 | 4 | 2.4. At F 22, the lens lets in a very small amount of light, it is at minimum aperture. At F 2.4, the lens lets in the maximum amount of light.
On "point and shoot" digital cameras you do not see this numbers on the side of the lens, the process of opening and closing the aperture is controlled electronically and has also increments like: 5.9 or 8.2
Hint: Use Small Aperture in bright light and fast moving subjects. You will have a more of the picture in focus. For close up use a large aperture and focus on the eyes.
Shutter Priority
(Depicted by an "S")
 |
The shutter priority setting is useful for sports and action photos where you want to freeze the action. Just like aperture priority, the shutter priority is still fairly automatic. Chose shutter priority when the sports mode is not quite fast enough to freeze the action that you are trying to capture.
The shutter is the device that controls the exposure time of the photo. The exposure time usually begins at 1/2000 sec. and goes up to 30 sec.
At 1/250 sec. exposure time, the shutter will let in 2 times more light than at 1/500 sec. and 2 times less than at 1/125 sec.
The exposure time determines how a photo will look, if it will be "shaken" or crystal clear. For example: you want to take a picture of a water fountain. You have two options; use a short exposure, or a long one. A short exposure (of 1/2000 sec.) will "freeze" the water droplets in mid air; the detail of every droplet will be clearly visible in the photo. A long exposure time (of 1 sec.) will create a special effect where the falling droplets traces unite to create streams of water.
Museum
(Usually depicted by a picture of a building.)
The museum mode is for quiet settings were sound and flash is not desired. Besides turning off the flash and sound the museum mode is still fully automatic.
Sports/Action
(Usually depicted by a person running.)
The sports or action mode has a default high shutter speed. The fast shutter allows you to freeze the motion and avoid blur. The sports or action mode is perfect for photos of waterfalls, waves, and of course sports.
Night Portrait
(Usually depicted by the silhouette of a person
with a moon or star.)
The night portrait uses a default slow shutter and aperture to capture the person and the background. The slow shutter and aperture ensure an evenly lit photo with more detail. It is important to keep the camera steady when using night mode or the photo will blur.
Portrait
(Usually depicted by a profile of a head.)
The portrait mode will blur the background while keeping the person in focus. Portrait mode is great for blurring distracting backgrounds. The portrait mode does require good lighting as flash will flatten the photo.
How to Scan a Photo
For those that have a photo print they would like to submit for the calendar it can be scanned as a high-resolution image file. All you need to do is make sure you scan and save it as 300 ppi.
Just open your image in Photoshop or any image editing software or even the dedicated software that came with the scanner, select the final size (12 X 9 or higher) and 300 dpi resolution.
If you don't have a high-resolution scanner you can send me your pictures to scan. My scanner will take pictures up tp 12 X 17 inches at 2400 dpi. Your photo prints will be returned.
Calendar Photo Guidelines
Size: 11 X 8.5 inches
Quality: Min. 200 dpi, prefer 300 dpi
Image file types: PNG, JPG, Tiff, or RAW. (BMP and GIF files will not be accepted)
Pictures must be in the Landscape format (Width larger than height).
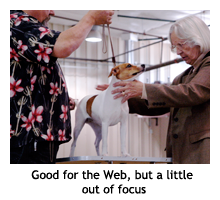
Farmdog(s) MUST be in focus. Out of focus photos are exaggerated when blown up to the print size.
How to e-mail large photo files
First you must compress the files. File compression is the practice of packaging a file or files to use less disk space. You can do this to send your high-resolution photos through e-mail. There is no data loss and once received by the user the file can be transformed back to the large file format.
Think of it as concentrated orange juice or powdered milk. First you extract all the water to allow for smaller packaging and faster shipping. Once the item is received by the user water is added to convert the item back to the original state and ready for use.
To store files in a Zip file, or to access the files in a Zip file, you need a compression utility. The Zip format is the most popular compression format used in the Windows environment, and WinZip is the most popular compression utility. You can download the free trial software package from here: www.winzip.com/downwz.htm
To create a new Zip file, open WinZip in the WinZip Wizard mode. (If the WinZip Wizard does not open by default, just click the Wizard button in the toolbar.) You will be asked "What do you want to do?" Simply select "Create a new Zip file" and click Next. The WinZip Wizard will guide you through the entire process.
Zip compression software is built into the Mac operating system (OSX 10.3 and above). All you need to do is right click [Control-Click] the file name in the finder then select [Compress]. Simple, save the zip file then attach it to an e-mail.